Showing posts with label Kali. Show all posts

Wednesday, May 3, 2017

Making a Kali training knife in Fusion 360 Part 2

Training knife - making a fixture


Originally this was going to be a two-part blog, design the knife and then make the knife. However, because of a few issues, specifically, the knife is larger than the travel on our mill, we decided the fixture was a bit more involved. Creating the fixture is now Part 2, and Part 3 will be the actual creation of the knife. 

For the complete video, click below:


First a big shout out to James on our marketing team, as he has access to a 3D printer, and printed me a sample knife so I could see if I wanted to make changes to the design. After getting the sample, I decided to refine the contour a little, adjust the hole diameter, and space the holes better. 

Visit James' blog UnprofessionalEngineering the podcast is pretty good, even if he hasn't had me on as a guest yet.  


Since the knife is longer than the "X" Travel on our mill, we will have to cut half of it, flip it around, and cut the other half. I'd like to be a little bit more productive in this task, so I designed a fixture to hold two pieces in the mill.

First we started with a simple rectangular shape.


Next we create a slot, so the knife will be supported by the raised portions, so the tool has clearance to position the bottom of the tool below the bottom of the knife stock.

From there, we add two bosses, which are the same size and distance as the first two holes in the knife design. This will be used to locate the knife.


Then we create a tapped hole in the center of the bosses, so we can screw the knife stock down.

From there, we drag and drop our part into the fixture drawing, and use an Assembly > Joint command to locate them together.
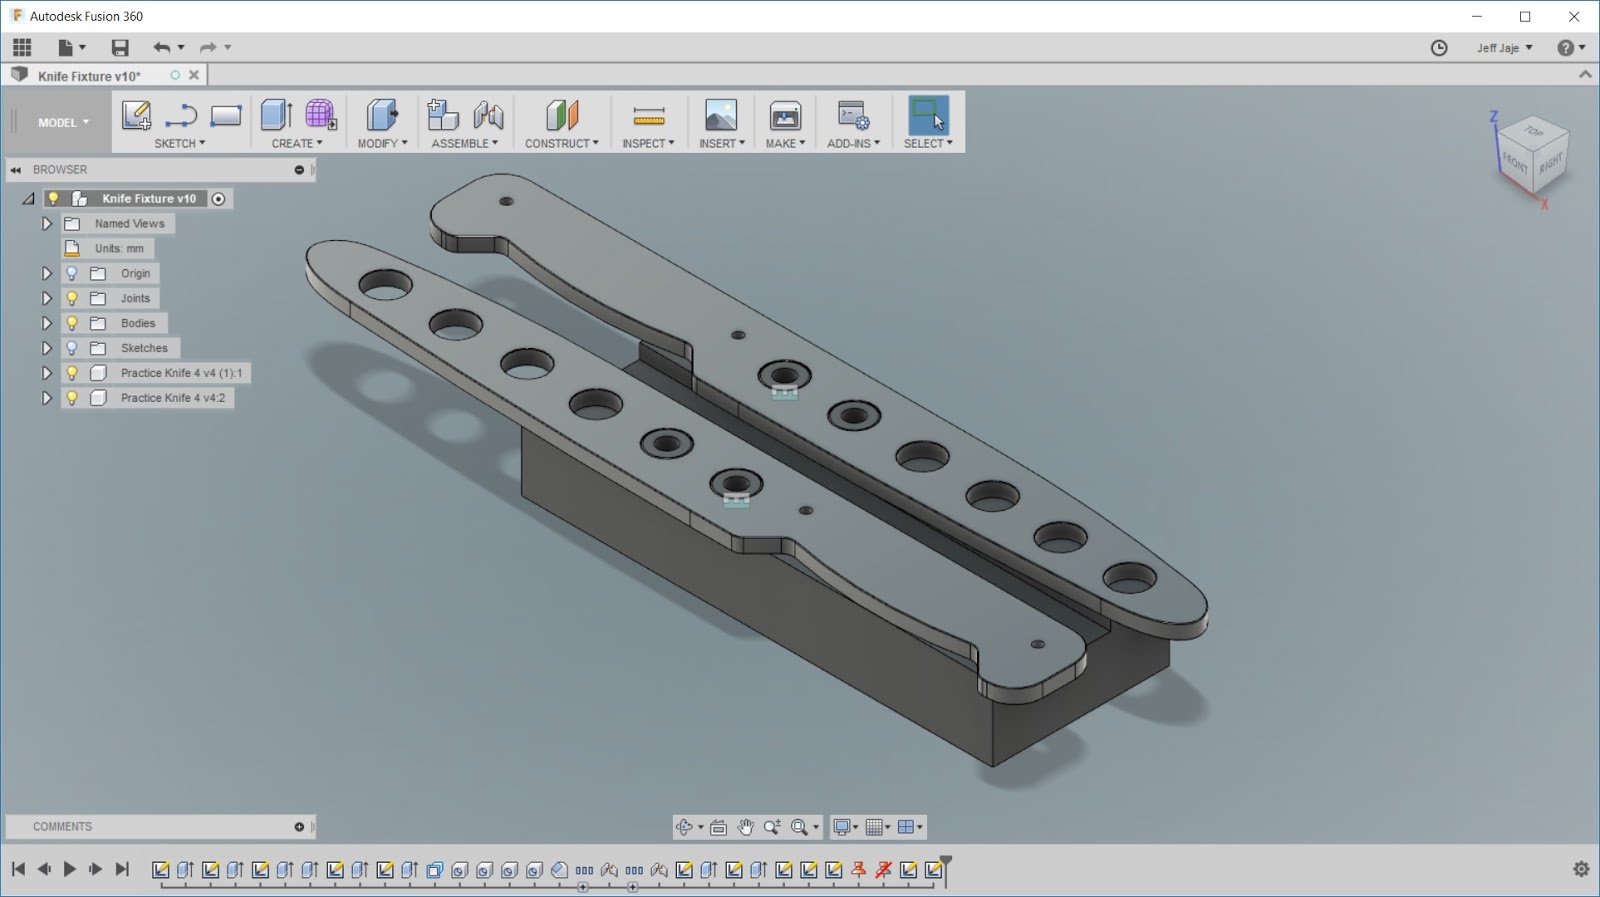
When complete, and assembled, the fixture, with parts ready to mill, will look like the image below. I'm using an aluminum strap, with the 5/16 bolts, to hold the parts down. I figured this was the best way to reduce vibrations of the relatively thin aluminum bar stock.

In part 3, we will mill the knives, and finish up. I hope you enjoyed this blog, and please leave a comment on anything you'd like to see designed or made. 


Saturday, March 11, 2017

Making a Training Knife in Fusion 360

Designing a training knife in Fusion 360

Many people that practice and study the martial arts, eventually practice with a training knife for instruction relating to bladed weapons. This is especially true if you practice a style that specializes in knife fighting, such as many of the Indonesian and Filipino systems do. 

For this blog, we wish to manufacture some of our own training knives, as the class size is growing and we need some more. We already have some sample blades, and some extra material that may work out nicely.

We are not attempting to create the original blade exactly, but rather make a design that is just as functional, but is our own and works within the material we already have on hand.

We have already recorded a video of our design, and you can watch it below:


Original

Below is an image of the original blade, and the material we already had in stock to create a training knife. Thickness is the same, but the stock is not quite as wide, meaning the finger guard will likely end up being a little smaller. In reality, the finger guard is very important to your own safety, but for the training knife, what we have should suffice.


Start Designing

There are many ways of designing this, and this is just one method. Here we started by making a sketch rectangle the size of the blank. We used the Tab key to go from the height to length dimensions. You can also perform arithmetic expressions in the dialog box.


Add Arcs

We then used the 3-pointy Arc command to create an arc shape at the top and bottom of the blade. Since we don't need to follow any kind of print exactly, we are going for an aesthetic shape, that will be safe in use. 


Spline the End

Because these will be used in training, we want the end to be blunt and have no sharp corners. In this case, we used the spline command to make a curve that s a rounded end. After making the spline, we forced a tangent constraint. The advantage of using the spline is that we can push and pull it to make the blade longer, and it maintains a smooth shape and the tangency at all times. 

Working on the Grip

From there, we work on the grip by filleting the corners on the pommel, and adding two lines and a 3-point arc for the grip.


More fillets and circles

We finish the grip by creating more fillets in all the corners. Then for the holes in the blade, they can be added as a hole after the solid is made, or they can be added as part of the sketch as a circle. In this case, we added some circles to be used as holes in the blade. 

Extrude into a solid

Lastly, we will extrude the sketch profile into a solid, making it 6.35mm thick. To further add safety, we can add a chamfer to the top and bottom profile of the blade.


Stay Tuned:

In our next video, we will program and mill the training knife on a CNC milling machine.

We hope you have enjoyed this video and blog, and feel free to ask any questions.